- Layout main này chính là giao diện chính của ứng dụng.
- Dưới đây là các class hỗ trợ xử lý nghiệp vụ:
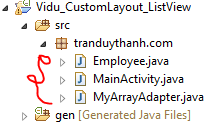
- Class MyArrayAdapter kế thừa từ ArrayAdapter, mục đích của nó là giúp chúng ta Custom lại layout cho ListView.
- Cuối cùng MainActivity.
- Bây giờ ta vào chi tiết từng class:
1) class Employee:
1
2
3
4
5
6
7
8
9
10
11
12
13
14
15
16
17
18
19
20
21
22
23
24
25
26
27
28
29
| package tranduythanh.com;public class Employee { private String id; private String name; private boolean gender; public String getId() { return id; } public void setId(String id) { this.id = id; } public String getName() { return name; } public void setName(String name) { this.name = name; } public boolean isGender() { return gender; } public void setGender(boolean gender) { this.gender = gender; } @Override public String toString() { return this.id+"-"+this.name; }} |
2) class MyArrayAdapter:
1
2
3
4
5
6
7
8
9
10
11
12
13
14
15
16
17
18
19
20
21
22
23
24
25
26
27
28
29
30
31
32
33
34
35
36
37
38
39
40
41
42
43
44
45
46
47
48
49
50
51
52
53
54
55
56
57
58
59
60
61
62
63
64
65
66
67
68
69
70
71
72
73
74
75
76
77
78
79
80
81
82
83
84
| package tranduythanh.com;import java.util.ArrayList;import android.app.Activity;import android.view.LayoutInflater;import android.view.View;import android.view.ViewGroup;import android.widget.ArrayAdapter;import android.widget.ImageView;import android.widget.TextView;public class MyArrayAdapter extends ArrayAdapter<Employee>{ Activity context=null; ArrayList<Employee>myArray=null; int layoutId; /** * Constructor này dùng để khởi tạo các giá trị * từ MainActivity truyền vào * @param context : là Activity từ Main * @param layoutId: Là layout custom do ta tạo (my_item_layout.xml) * @param arr : Danh sách nhân viên truyền từ Main */ public MyArrayAdapter(Activity context, int layoutId, ArrayList<Employee>arr){ super(context, layoutId, arr); this.context=context; this.layoutId=layoutId; this.myArray=arr; } /** * hàm dùng để custom layout, ta phải override lại hàm này * từ MainActivity truyền vào * @param position : là vị trí của phần tử trong danh sách nhân viên * @param convertView: convertView, dùng nó để xử lý Item * @param parent : Danh sách nhân viên truyền từ Main * @return View: trả về chính convertView */ public View getView(int position, View convertView, ViewGroup parent) { /** * bạn chú ý là ở đây Tôi không làm: * if(convertView==null) * { * LayoutInflater inflater= * context.getLayoutInflater(); * convertView=inflater.inflate(layoutId, null); * } * Lý do là ta phải xử lý xóa phần tử Checked, nếu dùng If thì * nó lại checked cho các phần tử khác sau khi xóa vì convertView * lưu lại trạng thái trước đó */ LayoutInflater inflater= context.getLayoutInflater(); convertView=inflater.inflate(layoutId, null); //chỉ là test thôi, bạn có thể bỏ If đi if(myArray.size()>0 && position>=0) { //dòng lệnh lấy TextView ra để hiển thị Mã và tên lên final TextView txtdisplay=(TextView) convertView.findViewById(R.id.txtitem); //lấy ra nhân viên thứ position final Employee emp=myArray.get(position); //đưa thông tin lên TextView //emp.toString() sẽ trả về Id và Name txtdisplay.setText(emp.toString()); //lấy ImageView ra để thiết lập hình ảnh cho đúng final ImageView imgitem=(ImageView) convertView.findViewById(R.id.imgitem); //nếu là Nữ thì lấy hình con gái if(emp.isGender()) imgitem.setImageResource(R.drawable.girlicon); else//nếu là Nam thì lấy hình con trai imgitem.setImageResource(R.drawable.boyicon ); } //Vì View là Object là dạng tham chiếu đối tượng, nên //mọi sự thay đổi của các object bên trong convertView //thì nó cũng biết sự thay đổi đó return convertView;//trả về View này, tức là trả luôn //về các thông số mới mà ta vừa thay đổi }} |
- Đây là class quan trọng nhất, mới nhất; dùng để custom layout.
3) class MainActivity:
1
2
3
4
5
6
7
8
9
10
11
12
13
14
15
16
17
18
19
20
21
22
23
24
25
26
27
28
29
30
31
32
33
34
35
36
37
38
39
40
41
42
43
44
45
46
47
48
49
50
51
52
53
54
55
56
57
58
59
60
61
62
63
64
65
66
67
68
69
70
71
72
73
74
75
76
77
78
79
80
81
82
83
84
85
86
87
88
89
90
91
92
93
94
95
96
97
98
99
100
101
102
103
104
105
106
107
108
| package tranduythanh.com;import java.util.ArrayList;import android.os.Bundle;import android.app.Activity;import android.view.View;import android.view.View.OnClickListener;import android.widget.Button;import android.widget.CheckBox;import android.widget.EditText;import android.widget.ImageButton;import android.widget.ListView;import android.widget.RadioGroup;public class MainActivity extends Activity {ArrayList<Employee>arrEmployee=new ArrayList<Employee>(); //Sử dụng MyArrayAdapter thay thì ArrayAdapter MyArrayAdapter adapter=null; ListView lvNhanvien=null; Button btnNhap; ImageButton btnRemoveAll; EditText editMa,editTen; RadioGroup genderGroup; @Override protected void onCreate(Bundle savedInstanceState) { super.onCreate(savedInstanceState); setContentView(R.layout.activity_main); btnNhap=(Button) findViewById(R.id.btnNhap); btnRemoveAll=(ImageButton) findViewById(R.id.btndelete); editMa=(EditText) findViewById(R.id.editMa); editTen=(EditText) findViewById(R.id.editTen); genderGroup=(RadioGroup) findViewById(R.id.radioGroup1); lvNhanvien=(ListView) findViewById(R.id.lvnhanvien); arrEmployee=new ArrayList<Employee>(); //Khởi tạo đối tượng adapter và gán Data source adapter=new MyArrayAdapter( this, R.layout.my_item_layout,// lấy custom layout arrEmployee/*thiết lập data source*/); lvNhanvien.setAdapter(adapter);//gán Adapter vào Lisview btnNhap.setOnClickListener(new OnClickListener() { @Override public void onClick(View arg0) { // TODO Auto-generated method stub xulyNhap(); } }); btnRemoveAll.setOnClickListener(new OnClickListener() { @Override public void onClick(View arg0) { xulyXoa(); } }); } //gọi hàm xử lý nhập thông tin nhân viên public void xulyNhap() { String ma=editMa.getText()+""; String ten=editTen.getText()+""; boolean gioitinh=false;//Nam =false if(genderGroup.getCheckedRadioButtonId()==R.id.radNu) gioitinh=true; //Tạo một employee Employee emp=new Employee(); emp.setId(ma); emp.setName(ten); emp.setGender(gioitinh); //Đưa vào danh sách arrEmployee.add(emp); //gọi hàm cập nhật giao diện adapter.notifyDataSetChanged(); //Sau khi update thì xóa trắng dữ liệu và cho editma focus editMa.setText(""); editTen.setText(""); editMa.requestFocus(); } //hàm xử lý xóa public void xulyXoa() { //ta nên đi ngược danh sách, kiểm tra phần tử nào checked //thì xóa đúng vị trí đó ra khỏi arrEmployee for(int i=lvNhanvien.getChildCount()-1;i>=0;i--) { //lấy ra dòng thứ i trong ListView //Dòng thứ i sẽ có 3 phần tử: ImageView, TextView, Checkbox View v=lvNhanvien.getChildAt(i); //Ta chỉ lấy CheckBox ra kiểm tra CheckBox chk=(CheckBox) v.findViewById(R.id.chkitem); //Nếu nó Checked thì xóa ra khỏi arrEmployee if(chk.isChecked()) { //xóa phần tử thứ i ra khỏi danh sách arrEmployee.remove(i); } } //Sau khi xóa xong thì gọi update giao diện adapter.notifyDataSetChanged(); }} |
- Bây giờ bạn thực hiện chương trình và nhập một số nhân viên, rồi checked rồi nhấn xóa:
Xem tiếp p2
0 nhận xét:
Đăng nhận xét